
Simply Preparying may earn a small commission via affiliate links in this post. As an Amazon Associate, I earn from qualifying purchases.Limited time deal over on Amazon!The Westinghouse 2200 Peak Watt Super Quiet & Lightweight Portable Inverter Generator is on a killer Lighting Deal right now! Great Choice for Home Use as an Emergency Backup in a Power Outage and Strong … [Read more...] about Westinghouse 2200 Peak Watt Super Quiet & Lightweight Portable Inverter Generator
Preparing For Potential Tariffs: Should You Be Stockpiling?

Hearing about new tariffs can make people worry about stockpiling. Tariffs are basically taxes on goods brought in from other countries. When tariffs go up, companies often pass that cost to shoppers. This makes items made overseas cost more. It's hard to know exactly which goods or countries will be affected before it's official. But knowing the types of products often hit by … [Read more...] about Preparing For Potential Tariffs: Should You Be Stockpiling?
Make Your Own DIY Fire Starter Kit
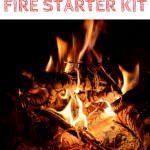
Making your own DIY Fire Starter Kit will allow you to start a fire in both everyday and survival situations. Added bonus, these kits are easy to make, and fit into a 72 Hour Kit! Let's get to work! You know the rule about having one is like having none, and having two is like having one? Well, this rule applies to your DIY Fire Start Kit too. You'll want at LEAST TWO … [Read more...] about Make Your Own DIY Fire Starter Kit
Natural Antibiotics and Medicinal Herbs

In a long emergency, getting to a doctor could take a few days...or weeks. Natural antibiotics may be your first defense against infection until you can see a health care professional. Here are some ideas on natural antibiotics and medicinal herbs to store for emergencies and every day use. What Is An Antibiotic? An antibiotic is a medicine that inhibits the growth … [Read more...] about Natural Antibiotics and Medicinal Herbs
100 Gallons Of Emergency Water Storage In 15 Minutes

Water is a first priority in the preparedness world, and for good reason. In as little as three days without water, humans die. Because of this, we talk a lot about water on this blog. Today we are going to talk about how to attain 100 gallons of emergency water storage in as little as 15 minutes. How Much Emergency Water Storage Do You Need? Generally about 8 bottles … [Read more...] about 100 Gallons Of Emergency Water Storage In 15 Minutes