• Skip to main content
  • Skip to secondary menu
  • Skip to primary sidebar
emergency preparedness

Simply Preparing

Survival blog for disaster and emergency preparedness.

  • Home
  • About Simply Preparing
  • Beginning Prepping
  • Simple & Inexpensive Prepper Projects

Homemade Pizza Tutorial

February 5, 2013 By ParkerMama

As an Amazon Associate, I earn from qualifying purchases.

One great way to save money for preps is to stop eating out and use the savings for prepping. I well know how hard that can be. It’s so easy to pick up the phone and order a pizza. It’s also easy to make you own pizza. Don’t believe me? You will after you read our Homemade Pizza Tutorial.

The biggest complaint I hear about homemade pizza is about the crust. It’s soggy. It’s doughy. It just plain tastes bad.

I can honestly promise you this pizza crust recipe will surprise you. It will taste like take out. Crisp. Light. Thin or thick. You will love this crust. Pinky swear. It’s all in a few tricks of the trade that I share below. Shall we get started?

Disclaimer: This isn’t my original recipe. I found it on Lauren’s Latest.


Ingredients for homemade pizza dough:

1 cup warm water
2 1/4 teaspoons active dry yeast
1 tablespoon honey {or sugar}
2 teaspoons salt
2 tablespoons olive or canola oil
3 cups bread flour {give or take 1/2 cup…depending on the heat & humidity}

Directions:

In a large mixing bowl, preferably that of a stand mixer, stir yeast and honey into warm water. Sit for 5-10 minutes or until bubbles form and mixture starts to foam. This tells you that the yeast is alive and kicking. Pour in salt, oil and half the flour and mix.

Making pizza dough in a Blendtec Blender

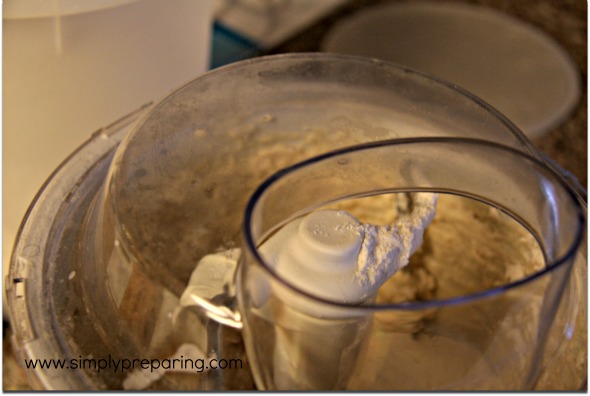
The reason you only add half of the flour is because how much flour you add depends on how humid your home is. Yup. I kid you not.

The more you make this dough the more experienced you’ll get with it’s proper ‘feel.’ You’ll know if it needs the entire amount the recipe calls for. It’ll most likely change depending on the seasons.

Slowly add the rest of the flour until the dough is soft but DOES NOT stick to your fingers.  I have better pictures about this on my main blog.

Part of the magic of this dough is letting it knead for SIX MINUTES.  I think that is what I’ve been missing.  Letting my dough knead long enough.   I’d let it go for a few minutes, but I never thought to let it go for a full 6 minutes.
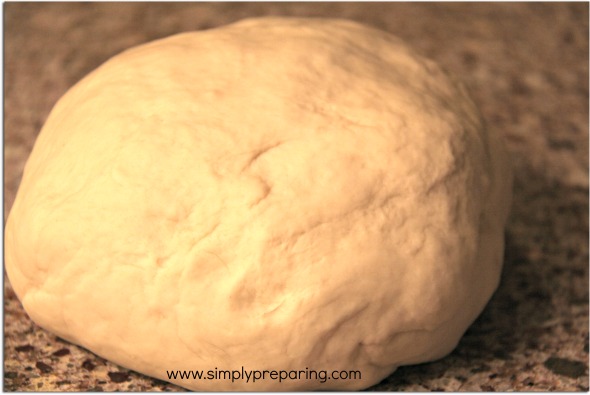
fresh, homemade pizza dough

Ain’t she grand?


Next you will want to place your dough into a lightly oiled bowl, cover it with a thin, wet kitchen towel and put it some place warm until it grows to double it’s size about 1-2 hours.   I like to put mine on the top of my stove and then turn the oven on low.

When your dough has doubled in size preheat your oven to 500 degrees.   If you have a pizza stone, make sure to put it in the oven while it’s preheating.

If you don't have a pizza stone you can use an upside down jelly roll pan.

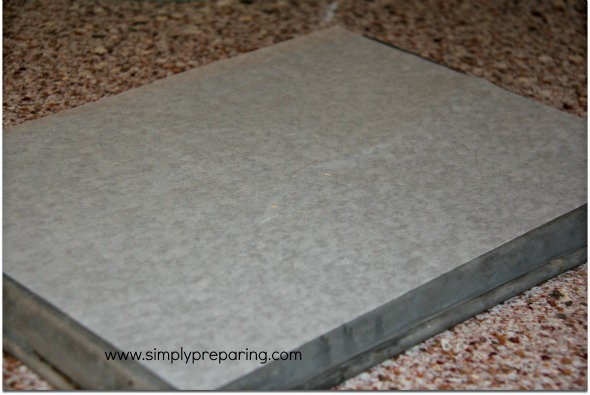
I don’t have a pizza stone.  I use an upside down jelly roll pan in the oven.  I use cover it with parchment paper.

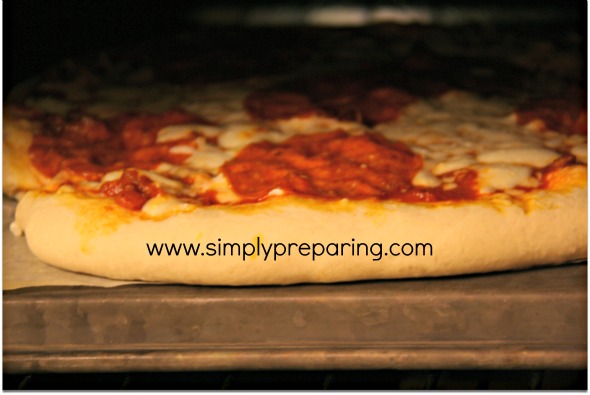
Next it’s time to roll your dough out.  I roll out my dough on my counter.  Then I lift it up and place it on a piece of parchment paper.  I add my toppings, and then transfer the pizza still on the parchment paper, directly onto my hot upside down jellyroll pan in my 500 degree oven.

pizza dough ready for toppings

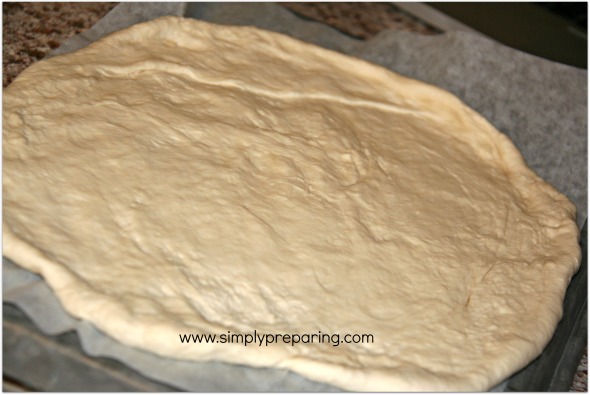
Ready for homemade pizza toppings!


I let my pizza cook for 9 minutes.  My poor oven has seen better days and cooks pretty hot.  You may need to leave yours in for a minute or two longer.

Homemade pizza baking in the oven.

Fresh homemade pizza right from the oven!

Pizza at home just like the Pro's make!

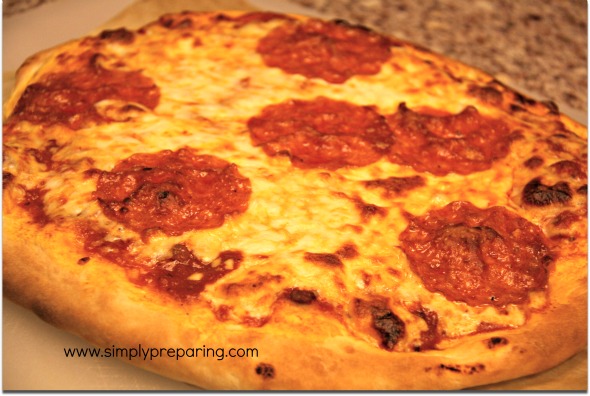
The results?  Ah-ma-zing.  Truly.  Totally.  A new family favorite.

Give this recipe a try and come back then let me know how it worked out for you!  If you have any questions, I’d be happy to answer them in the comments section below!


Filed Under: cooking tutorial Tagged With: homemade cooking, prepping on a budget, recipes

About ParkerMama

Tammy is a mom to 6 wonderful kids, including Parker, who came with an extra chromosome! She is passionate about special needs advocacy, living within her means, and preparing for an uncertain future. Tammy's main blog is Praying For Parker. Make sure to visit her there as well!

Reader Interactions

Comments

  1. FunMumX3 says

    February 7, 2013 at 2:26 pm

    Does it freeze well, and if so, at which point do you freeze it – before or after rising, kneading or when? Thanks!!!!!!

Primary Sidebar

Why Worry About Preparing?

Preparedness makes more sense now than ever.

As we move through 2026, it’s clear that the world is shifting in ways many of us can feel — even if we can’t always predict what’s next. In recent years we’ve seen global supply chain disruptions, international conflicts affecting energy and food markets, extreme weather events across multiple continents, cyberattacks on critical infrastructure, economic uncertainty, inflation, and rising costs for everyday essentials.

From global pandemics to geopolitical tensions and natural disasters happening around the world, the message is the same: stability isn’t guaranteed.

Whether or not you believe we’re headed toward a major global reset, there are plenty of everyday realities that make preparedness practical — not extreme. Job loss. Health emergencies. Severe storms. Power outages. Supply shortages. Economic downturns.

Preparedness isn’t about panic.

It’s about positioning your family to respond calmly when life throws the unexpected your way.

We’ve found that the more intentional emergency planning my family does, the less I worry about the big “what ifs.” When you have food storage in place, backup plans for power and water, and practical skills to lean on, uncertainty feels manageable.

That peace of mind is powerful.

Here at Simply Preparing, we share the survival tips, preparedness strategies, and practical systems we’ve learned along the way — from pantry building and food storage to emergency planning and self-reliance skills. Our goal is not to create fear, but to create confidence.

And we hope you’ll join the conversation.

Preparedness is not a solo journey. We all bring different experiences, lessons, and perspectives to the table. Share what you’ve learned. Ask questions. Leave comments. We grow stronger and smarter together.

Now, let’s get started prepping.

Pick a post and begin reading. At the end of every article, the blog will randomly suggest three additional preparedness posts to explore. Set aside just 10 minutes a day to build your knowledge base. Small, consistent steps add up faster than you think.

Because when it comes to preparedness, we’re never truly “done” learning — and we’re never wrong for being ready.

Let’s prepare wisely.

Affiliate Disclosure

We are a participant in the Amazon Services LLC Associates Program, which means we may earn a small commission if you make a purchase—at no additional cost to you. We only recommend products we personally trust and believe are worth having as part of a simple, practical preparedness plan.

Privacy Policy and Cookies

This site uses cookies. Please read our Privacy Policy so you fully understand how we use them.

Copyright © 2025 Indigo Ink, LLC: Simply Preparing Disaster and Emergency Preparedness · WordPress · Log in