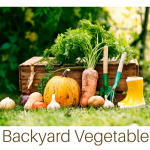
Beginning backyard vegetable gardens are gaining popularity. The benefits of vegetable gardening go way beyond simply saving money. Let's face it, there is nothing like the taste of a homegrown tomato. Here's a guide to getting your backyard garden growing. What Is Your Growing Zone? This is an important one. Your Growing Zone lets you know what you can plant, and when … [Read more...] about Beginning Backyard Vegetable Gardens
Urban Homesteading
Easy Homemade Nut Milk Recipe
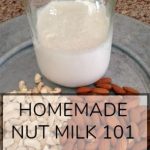
Commercial almond milk has become a mainstay on grocery store shelves. While I bought it for a while, once you start making your own, you never go back. Homemade nut milk doesn't come with unnecessary additives known to mess with your gut. Plus, making your own nut milk allows you to add your own choice of sweeteners if desired. Let's get started, shall we? How Hard … [Read more...] about Easy Homemade Nut Milk Recipe
Red Lobster Cheese Biscuit Bread Recipe
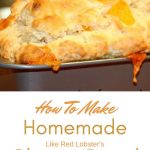
I love that Red Lobster cheese biscuit that makes you sigh with delight each bite you take. I wanted to make them at home, but I didn't want to go to the work of making individual biscuits. Instead, I decided to try this recipe for Red Lobster Cheese Biscuit Bread. Baking this copycat bread in a loaf pan means less hands on time in the kitchen, and that makes this busy Mama … [Read more...] about Red Lobster Cheese Biscuit Bread Recipe
Make Perfect Stove Popped Popcorn

We are big stove popped popcorn eaters around here. I pretty much pop a pan a day. My kids grew up on it. Cheap and whole grain healthy, with a long term storage life and the added bonus of being quick and easy to make, popcorn is a food storage mainstay. Which Pot Should You Choose? Your choice of pot to pop popcorn in is very important. It needs to have a heavy … [Read more...] about Make Perfect Stove Popped Popcorn
How To Make The Most Of Survival Seeds
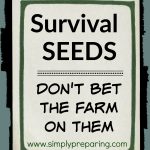
"I bought these survival seeds so that I can grow all my own food when the SHTF". I hear this a lot. Often from people who have never planted a seed in their entire lives. Experienced gardeners must be doing a terrific job of making their work look super easy for so many people to figure that if the world were to explode, they could just till up a little bit of dirt, … [Read more...] about How To Make The Most Of Survival Seeds
How to make goat milk yogurt.

My son, Parker, follows the SCD diet for his ulcerative colitis. This diet calls for yogurt. Goat milk yogurt is our yogurt of choice. Either powdered goats milk or fresh goats milk will work just fine. This recipe also works for cow's milk. It's important to know you can replicate any foods required for a special diet when the shtf, in one of it's many forms. It's … [Read more...] about How to make goat milk yogurt.
Starting Seeds Indoors: Germination
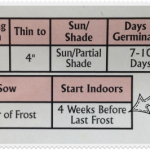
Starting seeds indoors? Really? Already? If you are like me, and still having huge storms at the end of March, it may be hard to remember that it is time to get those seeds started indoors! But believe it or not, it is. Steps for Starting Seeds Indoors: Buy fresh seed-look for the date stamp on packet. Remember that many preppers buy more seed than needed to store. If you … [Read more...] about Starting Seeds Indoors: Germination